suiss/ui · Block
Users Invite
An invite form that collects several email addresses as chips, assigns a role, and lists pending invitations.
Users Invite is an open-source block from suiss/ui for React, React Native, SwiftUI and Jetpack Compose. The @esuiss/ui CLI copies its source into your project, so you own the code.
An invite form that turns typed email addresses into removable chips, assigns a role and optionally sends a welcome email, with pending invitations listed below. Sending shows a toast and moves the addresses to the pending list, where each can be resent or cancelled. It sits in a Sidebar with admin navigation that opens as a sheet from the trigger on mobile. Use it for team invites or sharing access with several people at once.
Installation
CLI
Works in any project with a components.json. See Installation for the one-line registry setup. Or use the suiss/ui CLI:
Manual
- Install the dependencies:
-
Add the pieces it builds on: Button, Item, Select, Sidebar, Switch, Toast.
-
Copy the source into
components/blocks/users-invite.tsx:
- Update the import paths to match your project.
Usage
Replace the initial pending list with invitations from your API, and edit roles. Addresses are committed on Enter, comma, space or blur, and only valid, unique ones are added. Call your invitation API in place of the local send, resend and cancel handlers.
Notes
Each chip's remove button names its address, and the summary line is announced as chips change.
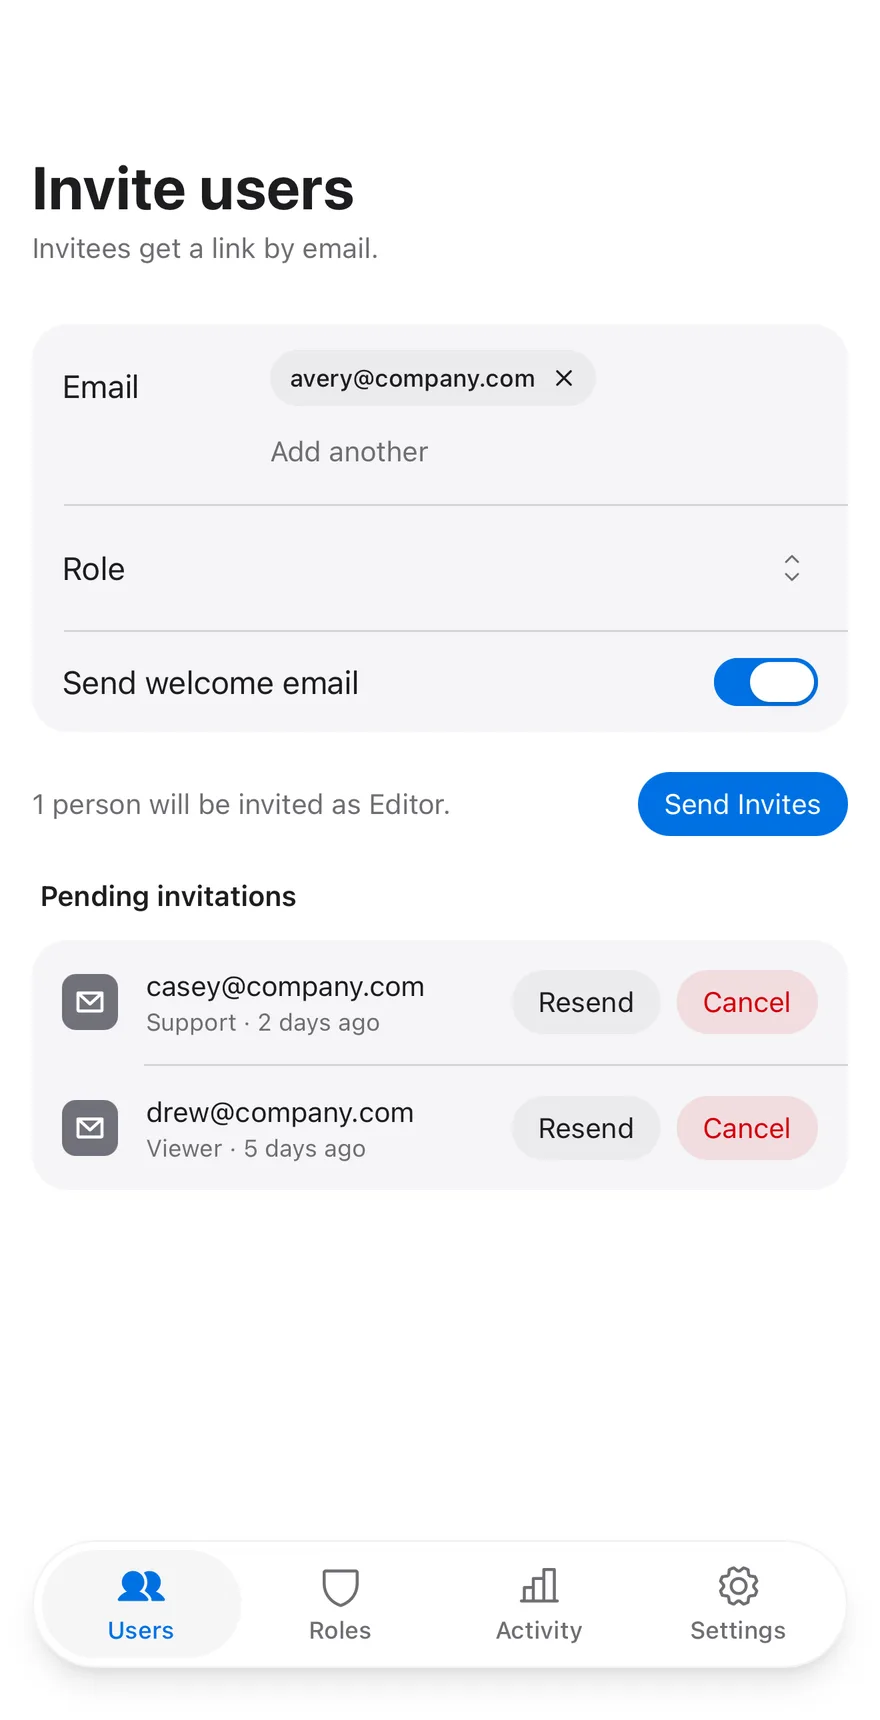
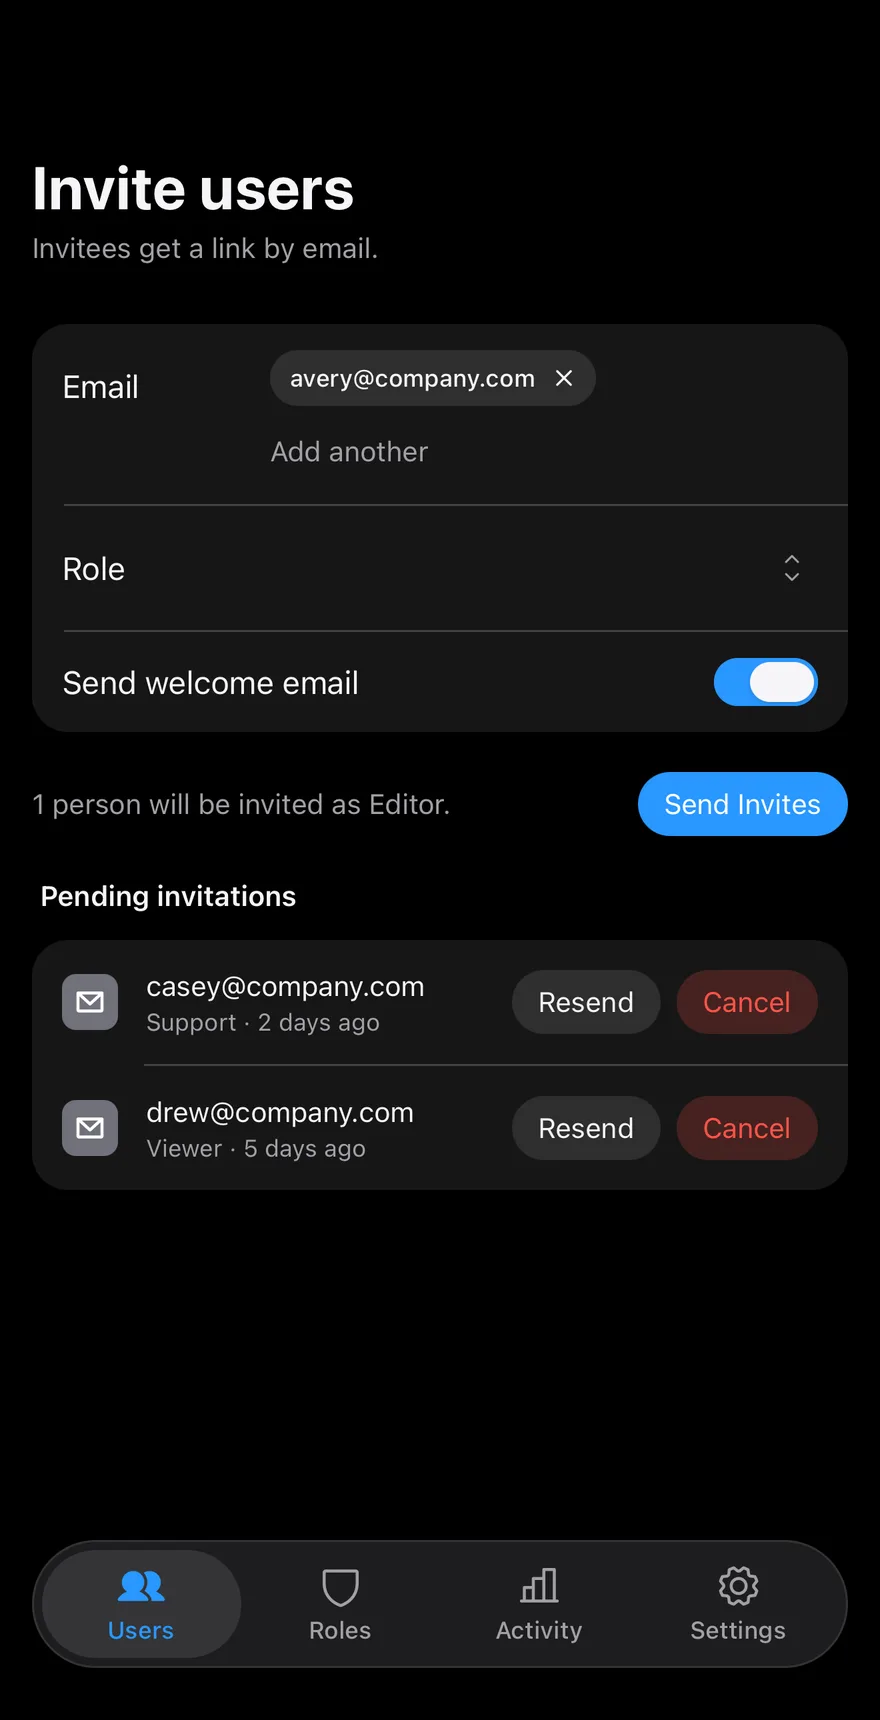
Emails become Chips as you type, and Backspace in an empty Input removes the last one. A Picker sets the role, a Switch toggles the welcome email, and the send Button adds the invites to the pending list. Pending invitations can be resent or cancelled, and sending or resending shows a toast through Toaster. The admin TabBar switches sections.
Installation
The CLI also adds what it builds on: Button, Chip, Header, Icon, Input, Item, Keyboard Scroll View, Picker, Screen, Switch, Tab Bar, Text, Toast. On React Native it also adds the animated view components/ui/animated-view.tsx.
Manual
- Install the dependencies:
-
Add the pieces it builds on: Button, Chip, Header, Icon, Input, Item, Keyboard Scroll View, Picker, Screen, Switch, Tab Bar, Text, Toast, and the animated view
components/ui/animated-view.tsxfrom the next step. -
Copy the animated view into
components/ui/animated-view.tsx:
- Copy the source into
components/blocks/users-invite.tsx:
- Update the import paths to match your project.
- Install the dependencies:
-
Add the pieces it builds on: Button, Chip, Header, Icon, Input, Item, Keyboard Scroll View, Picker, Screen, Switch, Tab Bar, Text, Toast, and the animated view
components/ui/animated-view.tsxfrom the next step. -
Copy the animated view into
components/ui/animated-view.tsx:
- Copy the source into
components/blocks/users-invite.tsx:
- Update the import paths to match your project.
- Install the dependencies:
-
Add the pieces it builds on: Button, Chip, Header, Icon, Input, Item, Keyboard Scroll View, Picker, Screen, Switch, Tab Bar, Text, Toast, and the animated view
components/ui/animated-view.tsxfrom the next step. -
Copy the animated view into
components/ui/animated-view.tsx:
- Copy the source into
components/blocks/users-invite.tsx:
- Update the import paths to match your project.
-
Target iOS 17 or later.
-
Add the Swift package to your app:
- Copy the theme files every view uses:
- Copy the source and every file it uses:
- Add the files to your app target.
- Set
minSdkto 24 or higher and add the dependencies:
- Copy the theme files every view uses:
- Copy the source and every file it uses:
- Update the
com.esuiss.uipackage names to match your project.
Usage
Replace ROLES and the initial pending invites with your data. Use onInvite, onResend, onCancelInvite and onNavigate to call your API.