suiss/ui · Block
Roles Requests
An access request queue where admins approve or deny permission requests, with an approval length setting.
Roles Requests is an open-source block from suiss/ui for React, React Native, SwiftUI and Jetpack Compose. The @esuiss/ui CLI copies its source into your project, so you own the code.
An access request queue where admins approve or deny permission requests, each showing the requester, the permission, a reason and when it was asked. An Approval length menu in the header sets how long approvals last. A decided row shows its outcome briefly and then collapses out of the list, and an empty state appears once the queue is clear. Use it for access reviews, join requests or any approval inbox.
Installation
CLI
Works in any project with a components.json. See Installation for the one-line registry setup. Or use the suiss/ui CLI:
Manual
- Install the dependencies:
-
Add the pieces it builds on: Avatar, Button, Empty, Select, Sidebar.
-
Copy the source into
components/blocks/roles-requests.tsx:
- Update the import paths to match your project.
Usage
Replace initialRequests with your pending requests, each with a name, permission, reason, time and avatar hue. Call your API in decide and pass the selected duration. Requests are matched by name, so switch to a unique id, and remove the Reset the sample link from the empty state.
Notes
Each decision is announced as it happens.
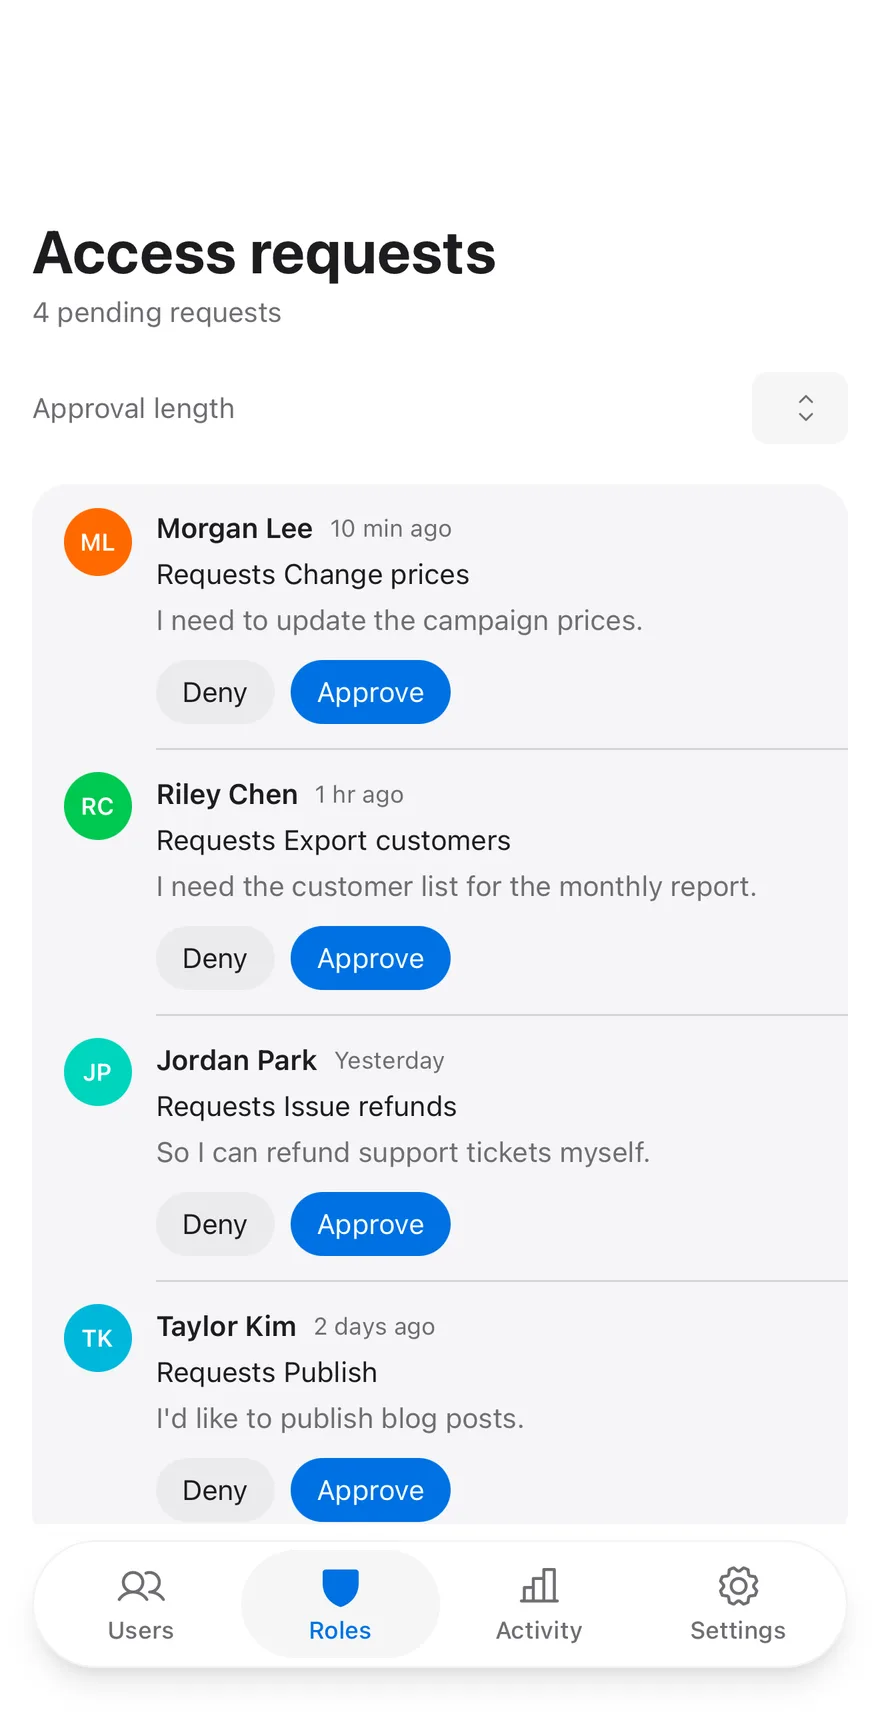
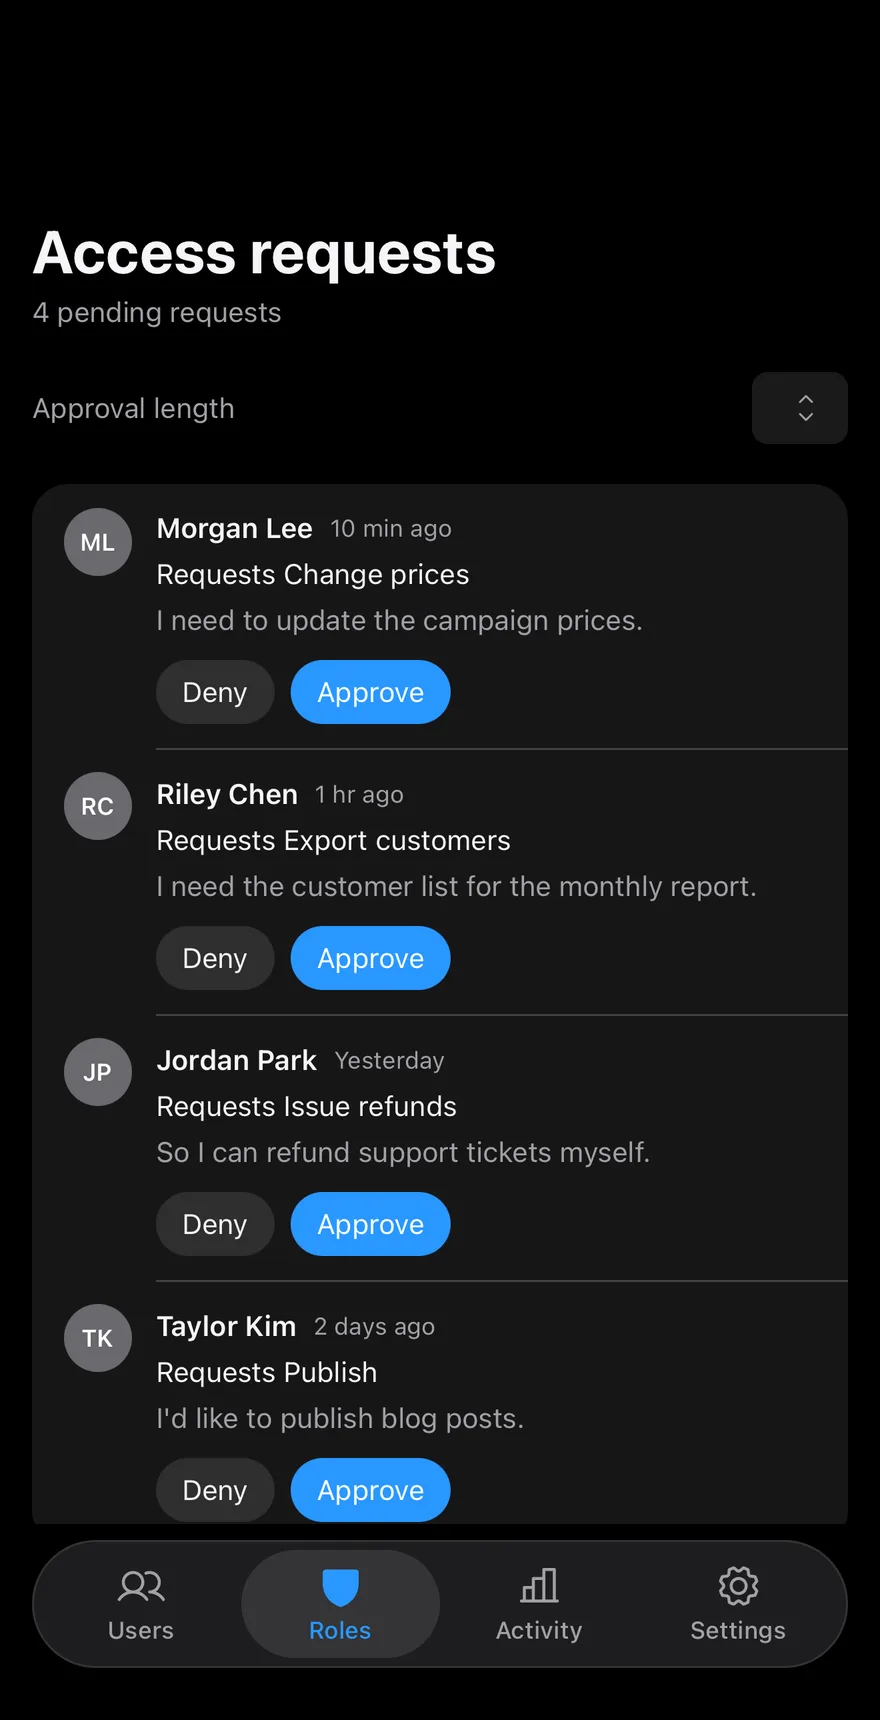
Each request shows an Avatar, the requester, the permission and an optional reason, with Deny and Approve Buttons. Rows use SwipeActions, so swiping from the leading edge approves and from the trailing edge denies, and decided rows collapse out of the list. A Picker sets the grant duration, and an Empty state with a reset link appears once the queue is clear. It uses a collapsing Header and the admin TabBar.
Installation
The CLI also adds what it builds on: Avatar, Button, Empty, Header, Icon, Picker, Screen, Swipe Actions, Tab Bar, Text. On React Native it also adds the animated view components/ui/animated-view.tsx.
Manual
- Install the dependencies:
-
Add the pieces it builds on: Avatar, Button, Empty, Header, Icon, Picker, Screen, Swipe Actions, Tab Bar, Text, and the animated view
components/ui/animated-view.tsxfrom the next step. -
Copy the animated view into
components/ui/animated-view.tsx:
- Copy the source into
components/blocks/roles-requests.tsx:
- Update the import paths to match your project.
- Install the dependencies:
-
Add the pieces it builds on: Avatar, Button, Empty, Header, Icon, Picker, Screen, Swipe Actions, Tab Bar, Text, and the animated view
components/ui/animated-view.tsxfrom the next step. -
Copy the animated view into
components/ui/animated-view.tsx:
- Copy the source into
components/blocks/roles-requests.tsx:
- Update the import paths to match your project.
- Install the dependencies:
-
Add the pieces it builds on: Avatar, Button, Empty, Header, Icon, Picker, Screen, Swipe Actions, Tab Bar, Text, and the animated view
components/ui/animated-view.tsxfrom the next step. -
Copy the animated view into
components/ui/animated-view.tsx:
- Copy the source into
components/blocks/roles-requests.tsx:
- Update the import paths to match your project.
-
Target iOS 17 or later.
-
Add the Swift package to your app:
- Copy the theme files every view uses:
- Copy the source and every file it uses:
- Add the files to your app target.
- Set
minSdkto 24 or higher and add the dependencies:
- Copy the theme files every view uses:
- Copy the source and every file it uses:
- Update the
com.esuiss.uipackage names to match your project.
Usage
Replace INITIAL_REQUESTS and DURATIONS with your data. Use onApprove, onDeny, onDurationChange and onNavigate to send decisions to your API and route between sections.